A Walkthrough of Object Detection Tasks with Brain Builder for AITRIOS
Feb 6, 2025
#Edge Vision AI #AI Models #Real-Time Monitoring #Smart Manufacturing #Object Detection #Anomaly Detection #Automated Inspection #Quality Control #Inventory Management
Following the End of Sale for Local Edition and Service Discontinuation of Brain Builder for AITRIOS, new sales of Brain Builder for AITRIOS and Local Edition have ended.
Brain Builder version used: v24.09.7
Estimated reading time: 9 Minutes
Detecting Fruits with Brain Builder for AITRIOS: Apples, Bananas, and Oranges
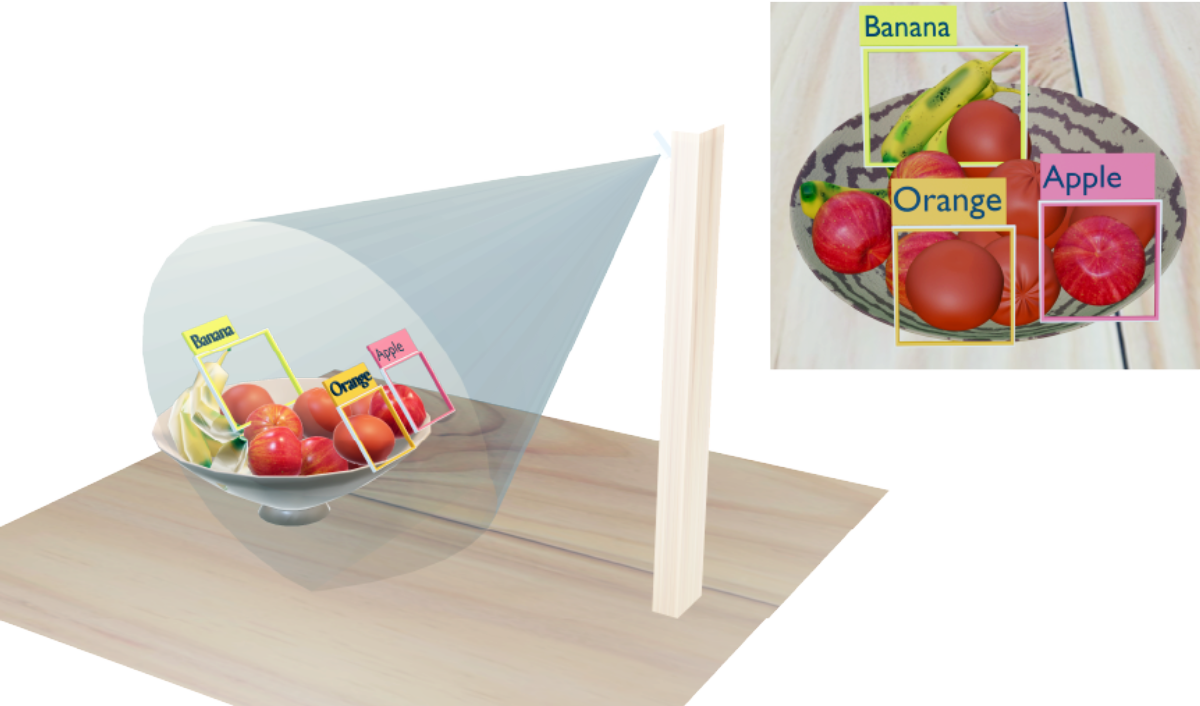
Imagine a world where AI helps streamline fruit sorting, quality control, and inventory management. With Brain Builder for AITRIOS, you can create a detector model that identifies fruits like apples, bananas, and oranges in real-time. This technology has applications in agriculture, logistics, and retail, where automating fruit detection can save time and reduce costs.
In this blog post, we’ll explore how a fruit detector AI model works, discuss its potential use cases, and guide you through building one using apples, bananas, and oranges as examples.
- Identify Fruits: Detect apples, bananas, and oranges in images for sorting or inventory purposes.
- Harvest Monitoring: Count and track fruit yield in orchards or farms.
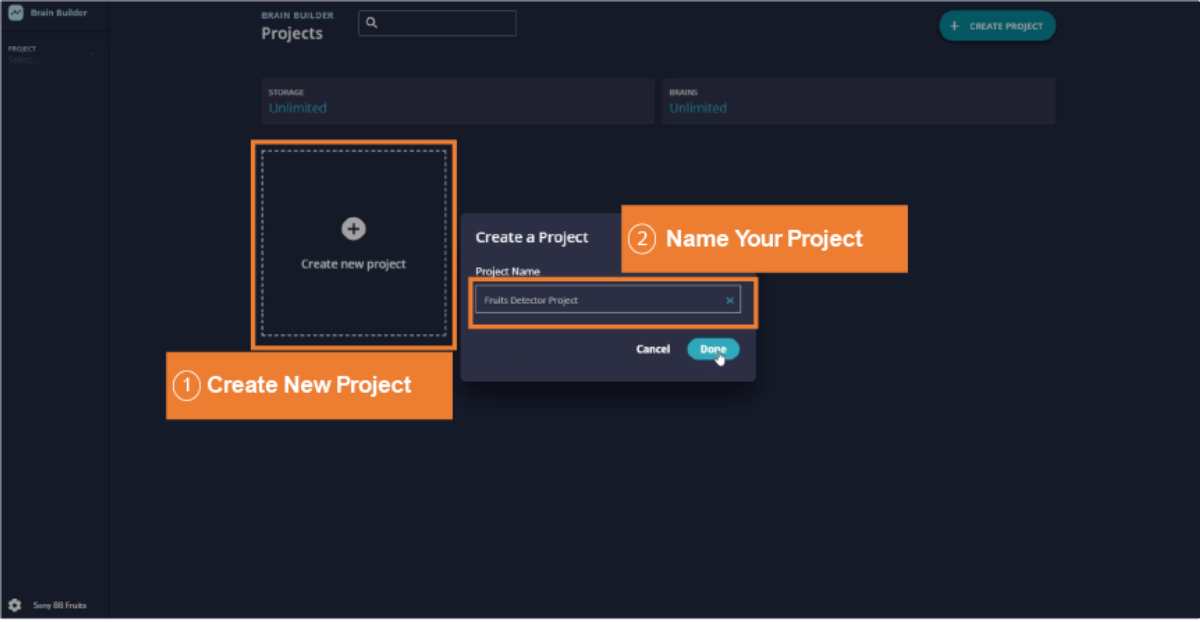
- Log in to Brain Builder for AITRIOS and click New Project.
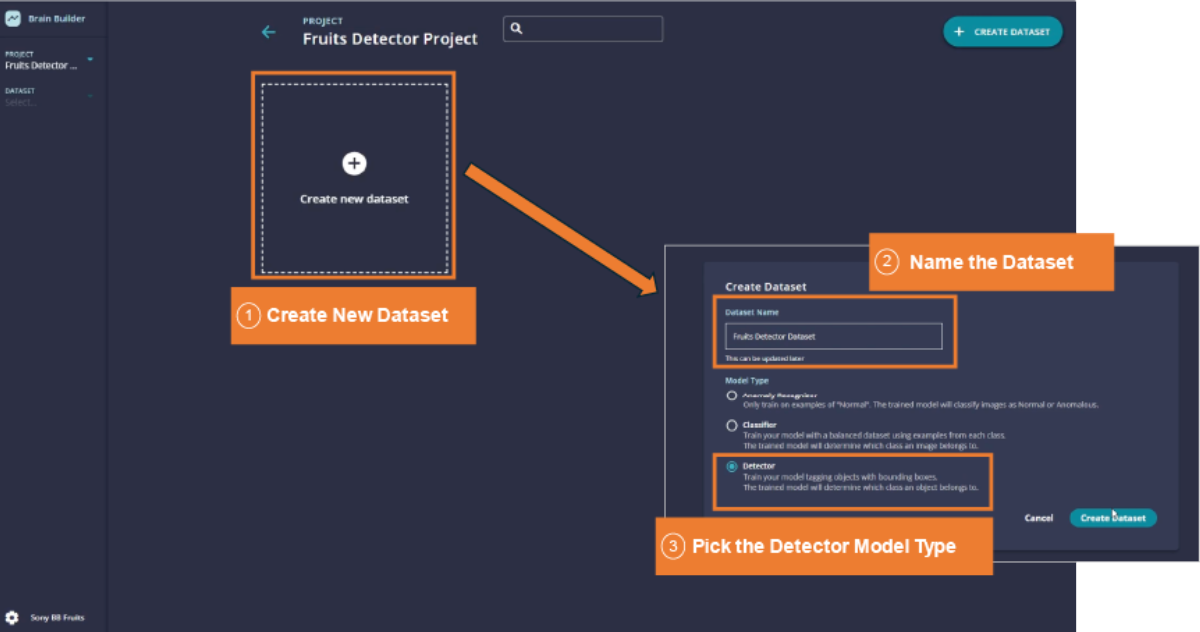
- Select the Detector model type.
- Name your project (e.g., “Fruit Detector”) and add a description.
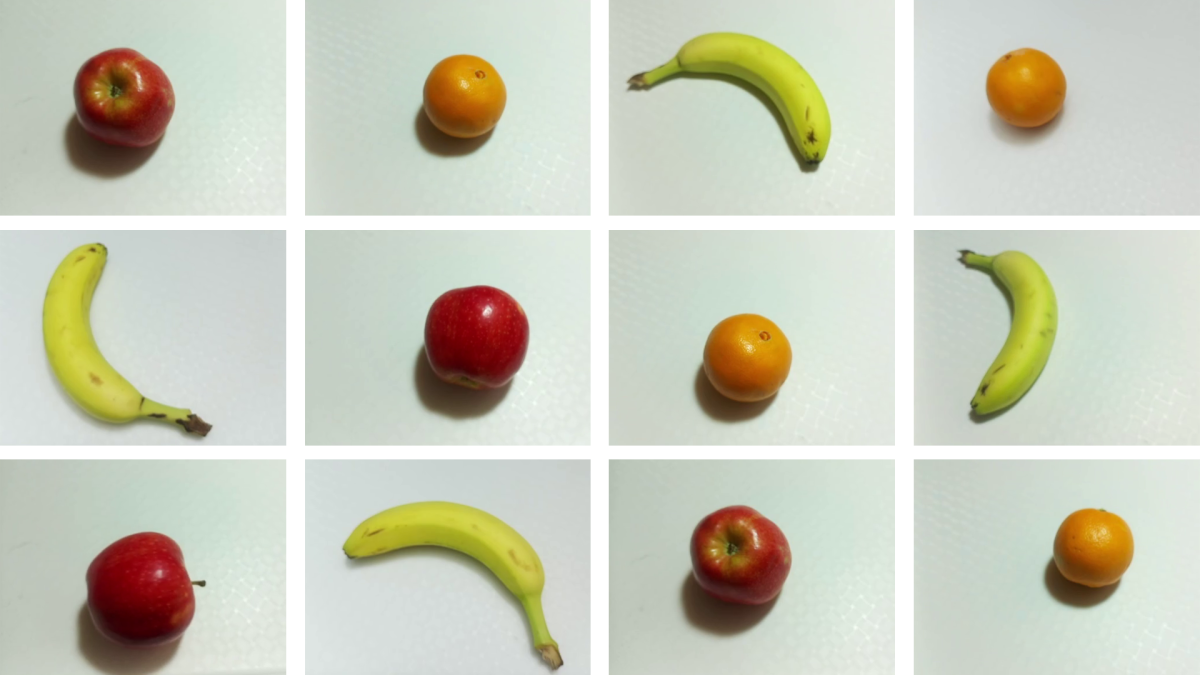
- Use your captured dataset with images containing apples, bananas, and oranges.
- Ensure the images represent real-world scenarios, such as fruits on conveyor belts, in baskets, or on store shelves.
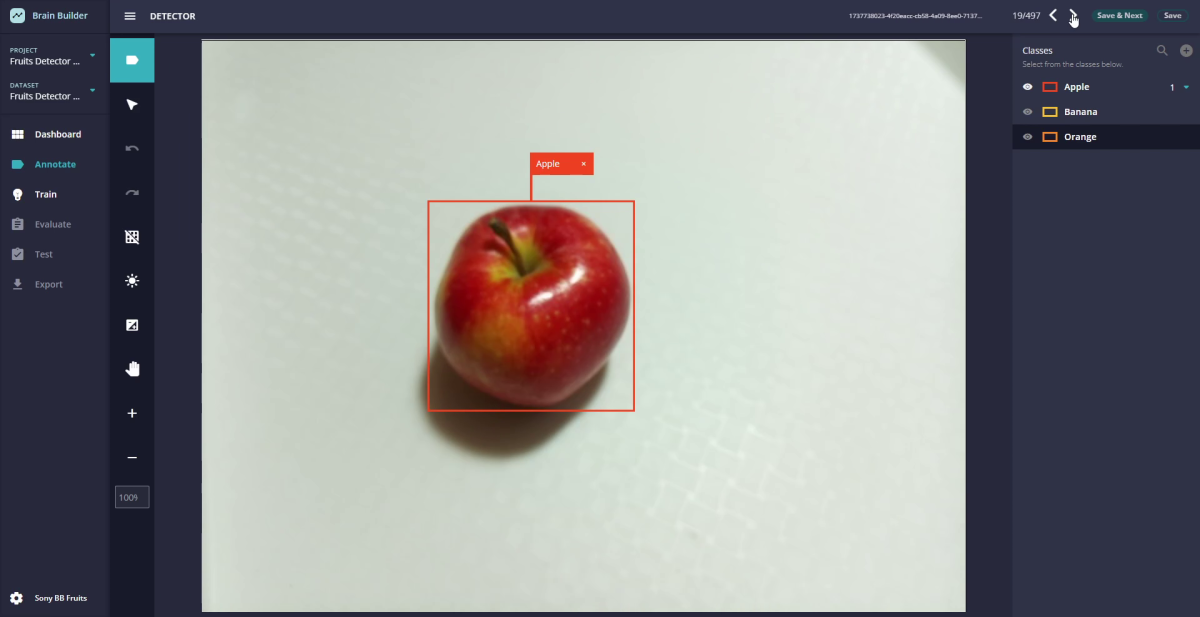
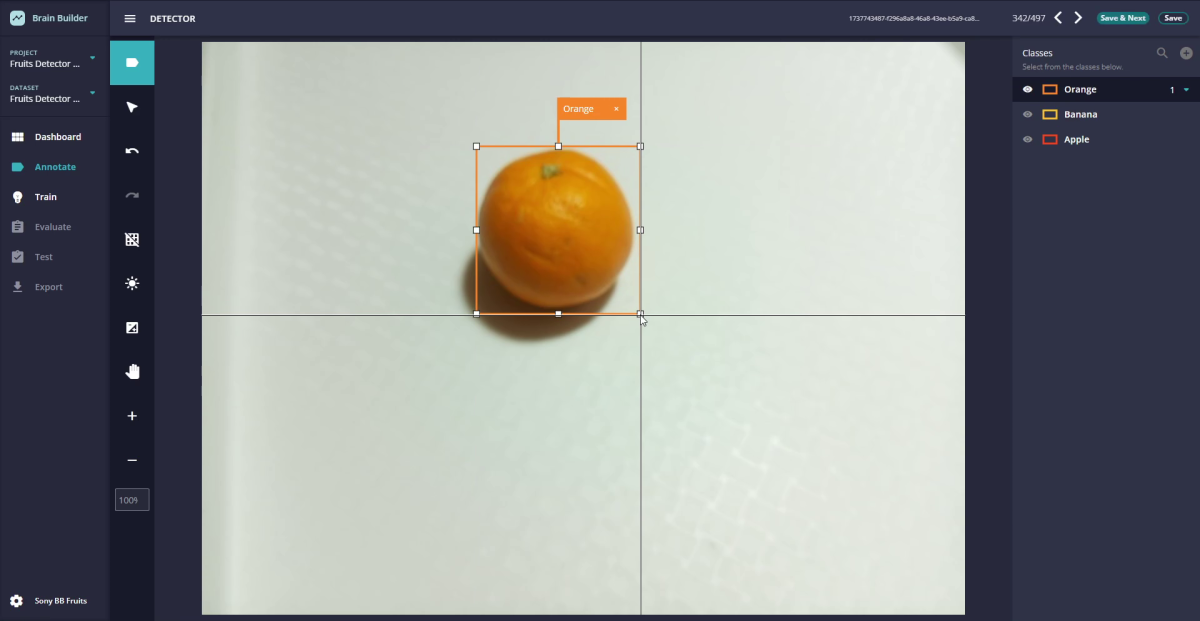
- Annotate the Images using Brain Builder:
- Draw bounding boxes around each fruit and label them according to your specific case. In our example, we will use the following annotations: “Apple,” “Banana,” and “Orange.”
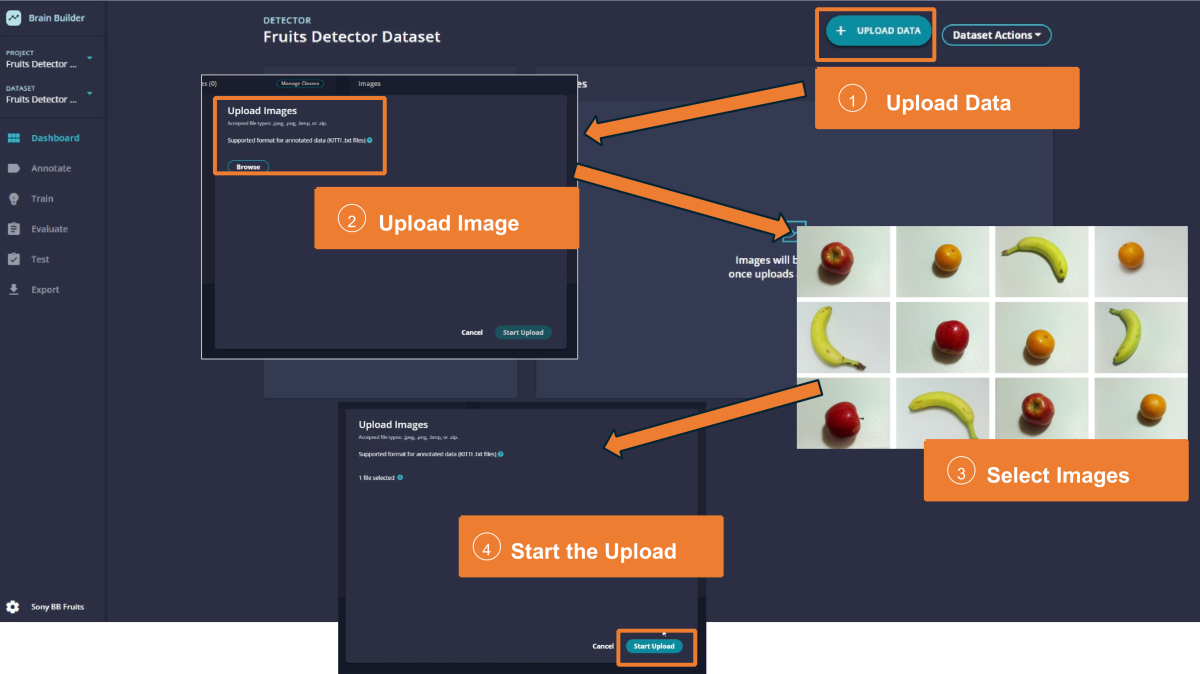
- Use annotated images in KITTI format:
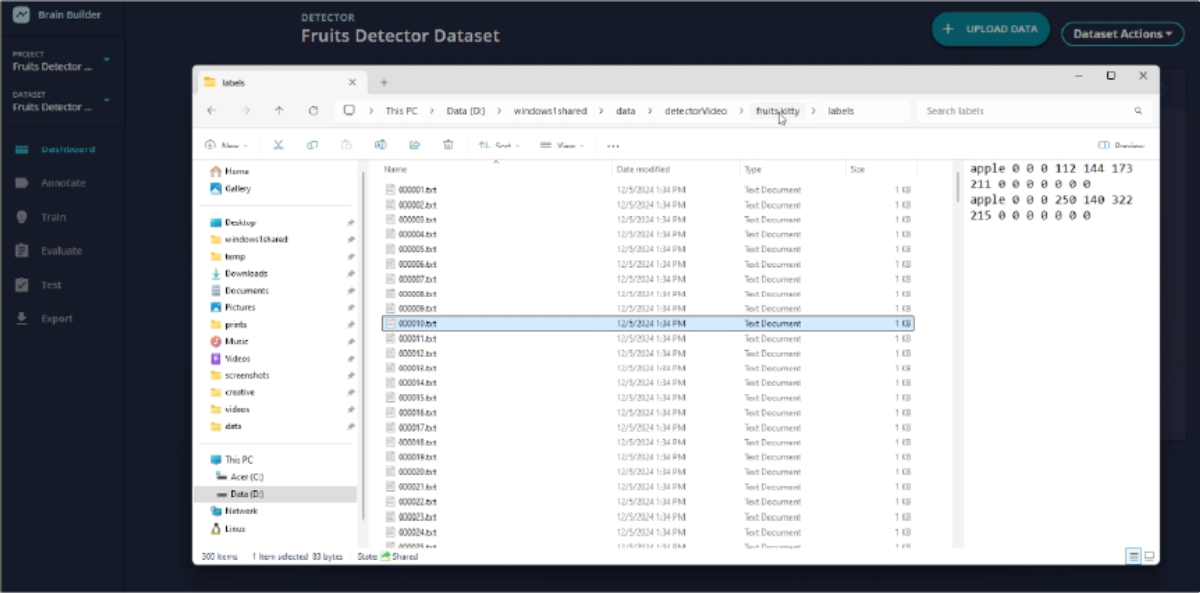
- Make sure you have a ZIP in the proper format and upload

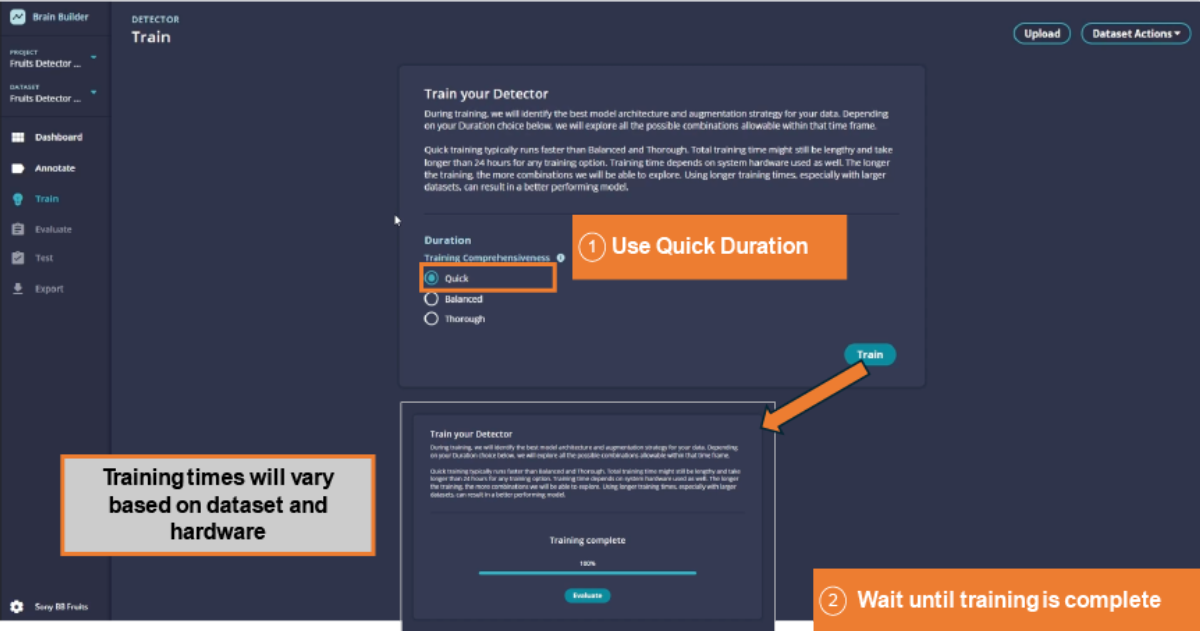
- Navigate to the Training tab and configure the duration settings:
- Quick: For testing the setup quickly.
- Balanced: For good results without excessive time.
- Thorough: For maximum accuracy when time allows.
- Start training the model. Brain Builder will evaluate multiple AI models and optimize the best one for your dataset.
- After training, review the metrics:
- Precision: Check how accurately the model identifies apples, bananas, and oranges without false detections.
- Recall: Ensure the model detects all the fruits in the images.
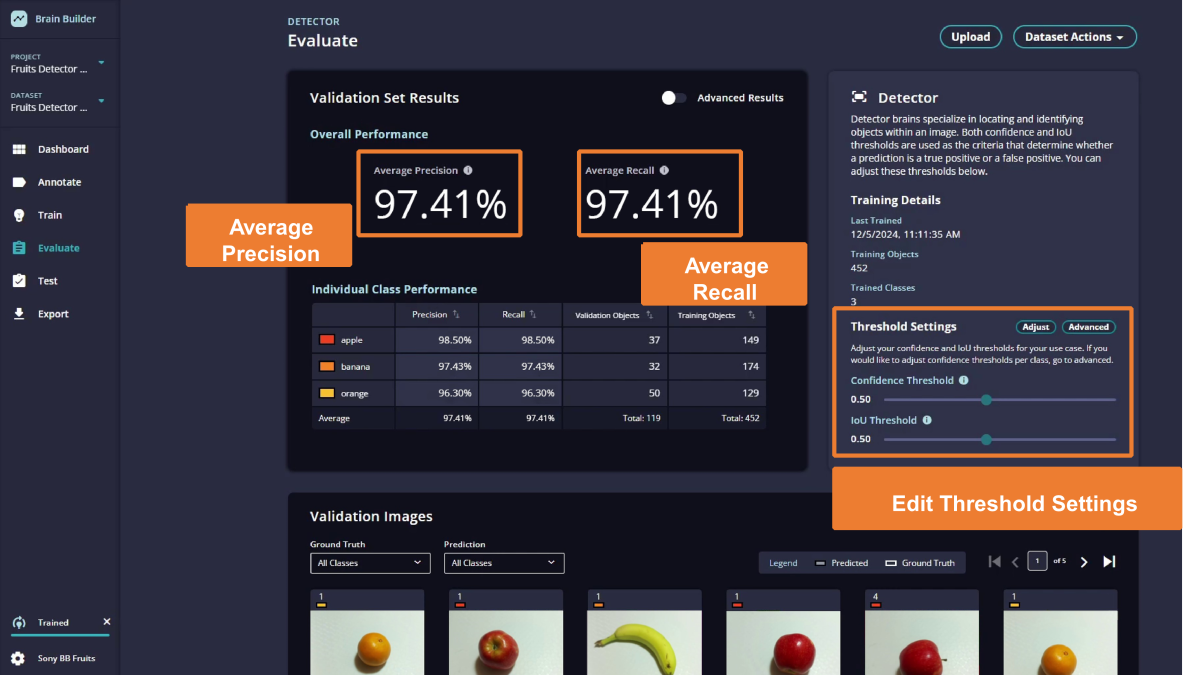
The Precision and Recall Metrics
- The Precision Metric tries to answer the question: "Of all the objects I detected, how many were correcty detected?"
- The Recall Metric tries to answer the question: “Of all the objects that exist, how many did I detect?”
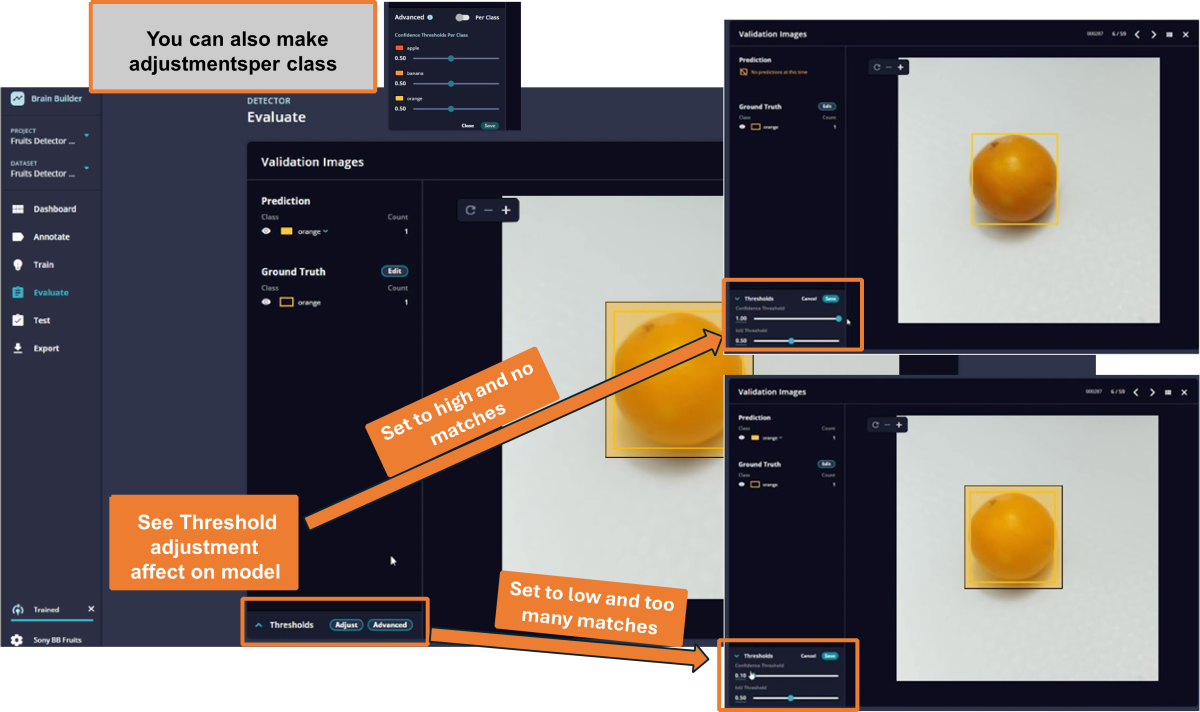
- The options to set are:
- The Confidence Threshold
- What It Does: Determines the minimum confidence level for detections to be considered valid (range: 0.1 to 1).
- How to Adjust:
- Lower threshold → Accepts more uncertain cases → Increases Recall (fewer missed detections).
- Higher threshold → Rejects uncertain cases → Increases Precision (fewer false detections).
- Default Value: 0.5, but should be adjusted based on your dataset and goals.
- The IoU (Intersection over Union) Threshold
- What It Does: Measures the overlap between the AI's detection box and the ground truth. Determines whether a detection is a True Positive.
- How to Adjust:
- Higher threshold → Requires more overlap → Ensures stricter accuracy.
- Lower threshold → Allows less overlap → Captures more detections, even if less precise.
- The Confidence Threshold


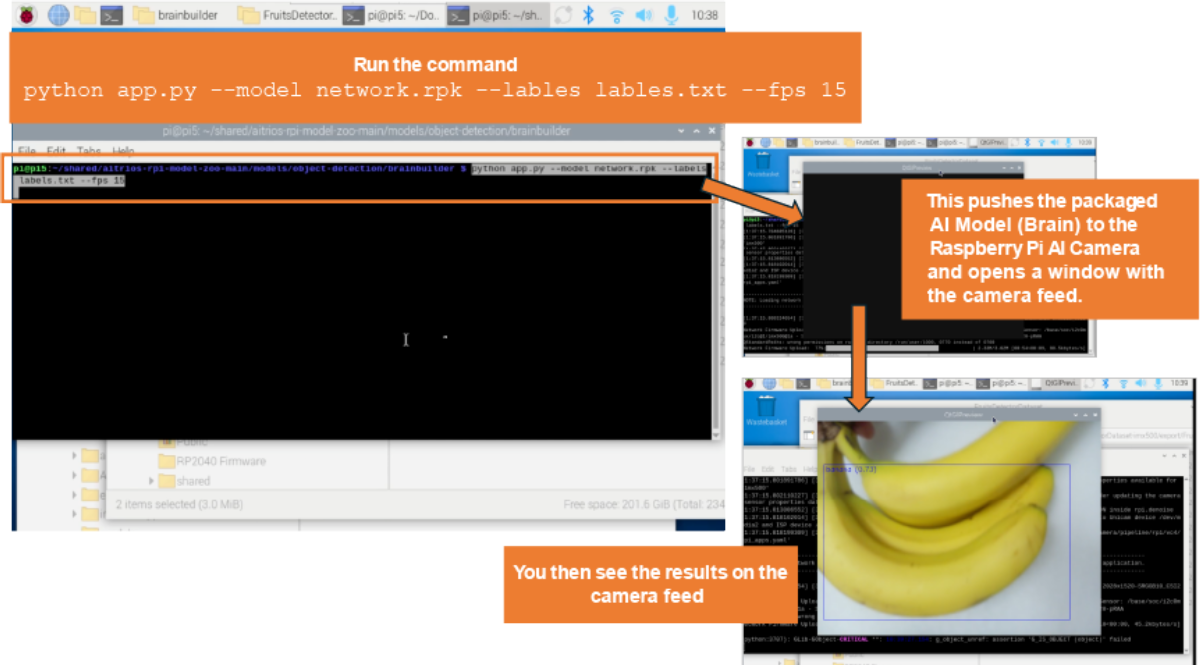
- Run the command below which will open a window displaying the camera feed:
- Watch as your Raspberry Pi AI camera runs your model in real-time, performing tasks from object detection to classification all completely on the camera freeing up your Raspberry Pi.
Tips for Success
- Balanced data: Ensure your dataset has a similar number of apples, bananas, and oranges to prevent bias.
- Augmentation: Add variations to your dataset, such as different angles and lighting, to improve robustness.
- Iterate: Use test results to refine your model by adding more labeled data or adjusting training settings.
Found this helpful? Share it!
Table of Contents
Category
#Edge Vision AI#AI Models#AI Model Training#Data Labeling#RealTime AI#No Code AI#Real-Time Monitoring#Environmental Monitoring#Smart Agriculture#Smart Manufacturing#Image Classification#Object Detection#Anomaly Detection#Automated Inspection#Quality Control#Inventory Management#Production Efficiency